

This year I'm taking a sabbatical pause to explore the world of tech, especially in Europe. So I've searched for a way to keep a record of what I'm up to: the cities I visit, the events I attend, the people I talk to, the tech I learn... This way, my family can follow my adventures, and I can help my forgetful brain to keep these memories for longer!
The obvious answer is a shared photo album. But none of the apps that I've tested had quite all that I wanted:
- I don't want to use a cloud service like Photo Circle, Google Photos, iCloud, etc because I want to own my data and host it in my homelab
- I use Nextcloud and Memories for my private photos, and they work well. But not so much for sharing albums with people outside the instance that do not have an account. Also, the UI/UX don't work well for my intended usage.
- Immich has shared albums with comments, which I wanted, but it doesn't seem to notify users on new comments.
So I've decided to develop a new alternative:

(pronounced like ni.di.ma.ge)
It's simpler than those apps, but it serves me well, and creating it taught me a lot on the way!
Features
Nidimages aims to be simple, yet effective. Here's a list of its main features:
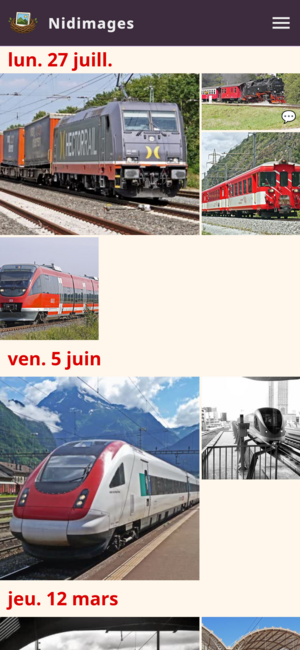
- create albums with photos, videos and text
- the album shows as a timeline, using the creation date of the photos when present in the file
- share and invite people to your albums
- connected users can comment on photos and videos
- optionally, be notified of activity with push notifications
- customise album name, URL, description, cover photo and appearance
- share the right to post new content with others
- original file quality is preserved for download
- fast and clean web navigation, light on Javascript usage
- accessible interface: supports keyboard navigation and screen reader
- multiple language support: English, French and Portuguese
- download multiple files as a single archive
- mark an album as archived to keep it around without clobbering the home page
- no tracking, no external connections nor dependencies
- it can be installed as a home shortcut in Android and iOS
- as the instance administrator, you can see all albums and users and edit user permissions
- easy to host (very lean on CPU and memory: uses less than 100 MiB, simple on-disk file structure, one binary with few system dependencies, available as a container image for Podman or Docker)
You can visit the demo instance at https://demo.nidimages.sitegui.dev to browse the photos and add comments. You can also create a new album and upload your own photos.
Note: this is an ephemeral test instance. All data is erased after 15 minutes.
And check the source repo if you're interested in hosting it yourself!
What I've learned
This project had some "firsts" for me:
It's the first time that I took unit tests for UI, keyboard navigation and screen-reader accessibility seriously. I'm using Playwright to write the UI tests, which is an amazing tool that I've discovered in a talk by Manon Carbonnel at Breizhcamp in Rennes.
It's my largest Rust web project so far. I have opted not to use frameworks like Leptos and the new Tokio Topcoat so that I learn the fundamentals first. In a next project, I'd like to prototype with those to compare the benefits.
My approach for Nidimages was to generate all HTML on the backend (like the good ol' days!), because it produces web
pages that are faster to navigate and interact. This means that heavy JS frameworks were out of the question.
I'm happy with the results, but I'm not so happy with my choice of using Jinja as the templating engine, because I lose
the advantages of the type system from Rust. Naturally, the Rust compiler is unaware of the connection between the Rust
structs and the templates. So refactoring or evolving the Rust code always requires find-and-replace and testing (both
manual and automatic), because silent bugs can pop anywhere.
I've also discovered the
<dialog> HTML element, which is pretty nice!
It implements the oh-so-common "modal" pattern where a new element pops on the screen for immediate attention (like
asking for some information or confirmation):
<button command="show-modal" commandfor="my-modal">
    Open modal
</button>

<dialog closedby="any" id="my-modal">
    <form action="/save-pi" method="post">
        <label>
            Favourite passage of π:
            <input class="input" name="pi">
        </label>
        <br>
        <button commandfor="my-modal" command="close" type="button">
            Cancel
        </button>
        <button type="submit">Save</button>
    </form>
</dialog>
Just use a div for this!, is what past me would say. But past me was unaware of how <dialog> is more accessible. It
solves all these problems, some of which are very hard to implement correctly:
- the dialog starts hidden
- when opened, the first interactive element is focused. This is important for screen-readers and people navigating with the keyboard
- keyboard navigation is constrained to the modal, so pressing
Tabwill not focus elements behind the modal - pressing
Escor clicking outside dismisses the modal - when opened, the page behind becomes dimmed and inert
- it integrates with
<button>without Javascript! Usecommand="show-modal"to open andcommand="close"to close.
And I also had some math fun to implement the pinch zoom interaction 😇